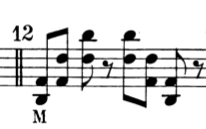
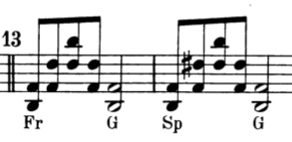
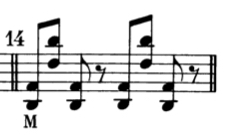
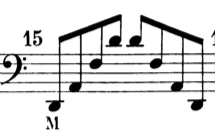
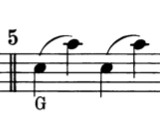
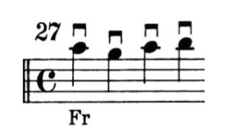
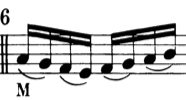
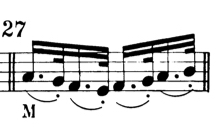
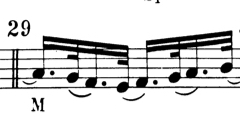
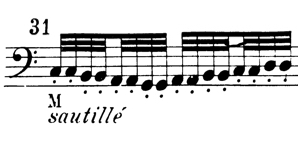
Blog 6 – Feuillard No. 32, Variations #4-7

Before working on the next few variations, I like to help refine the student’s understanding of intonation. In Blog #5 we talked about the basic concepts of using the perfect intervals to check the intonation with the open strings. We also helped to organize the left hand in first position by checking the first and fourth fingers with the open strings, thus creating a clear “structure” for the left hand (for most people the tendency is for the first finger to be sharp and the fourth finger to be flat in first position). I usually like to give the students at least a week to sort this all out, so that they can play the theme with more stable intonation, especially regarding the first and fourth fingers.  But then we need to address the middle fingers – the second and third fingers. For this I like to introduce the concept of  what Casals called “Expressive Intonation”:

Now we will continue with the next several variations in Feuillard #32, dealing with Bow Distribution, staccato strokes, and a combination of those two concepts.

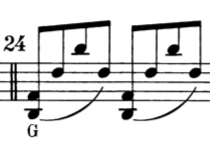
Variation #4:

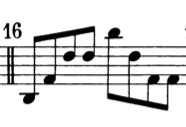
Var 4

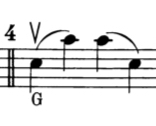
The definition of Bow Distribution consists of  two concepts:  “how much bow we use, and which part of the bow we use”.  In Variation #4 students will need to use the full bow (making sure that they really go all the way out to the tip), and then the upper half of the bow (using the lower part of the arm), and then the full bow (making sure that they go all the way to the frog), and then the lower part of the bow (using the upper part of the arm).

And they should be using Left/Right motion in order to further instill the concept of balance. However the choreography for the Left/Right motion is now a bit different: at the tip they should stay on the left side when using the lower arm and not rocking back and forth; then when they are using the upper arm in the lower part of the bow they should stay on the right side. We are training the coordination of the body for optimal ergonomic use, and this take some concentration until it becomes natural and easy.

I ask the students to write in their tempos for each variation at home, trying to figure out what the best speed should be for each one. Some variations “require” a slower tempo (e.g. those using the full bow); for other variations students will want to challenge themselves and find a faster tempo. Needless to say, there is a range of tempos that is possible – but as long as the student is in the “ballpark” with choosing a good tempo they are ok. One common element in finding the tempos is that we want a “core” sound, and they should use a good “block of sound”. It is more difficult to play with a low contact point and a good full sound – so that is what they should be looking for and practicing. If they choose a softer sound and a higher contact point I work with them to help change their “sound concept” to make the core sound their default for now. It usually takes a few lessons for the students to “get” what I am looking for in finding the tempos.

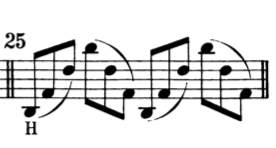
Variation #5:
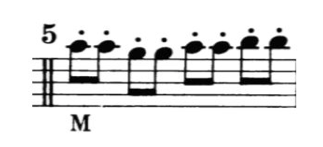
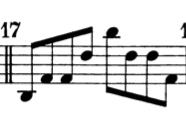
Var 5

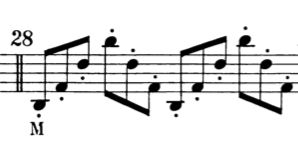
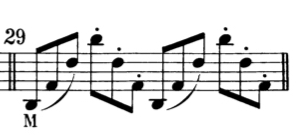
This variation is written with dots over the notes. That could be interpreted as either staccato or spiccato.  However I ask the students to play this variation only staccato for several reasons. First of all, they will be doing “off the string” strokes (spiccato)  in their daily scale work (the first scale system that I have them do from lesson one onwards is a legato two octave system. In addition to the legato scale I also ask them to play the scale “off the string” using eight notes, triplets, 16th notes, sextuplets and octuplets at about 60 to the pulse. This lets them experiment with spiccato right away. Playing spiccato every day in this way gets them used to playing with this light stroke, and prepares them for being able to play a fast sautillé towards the end of No. 32). So, they are already getting some daily experience with spiccato.

Another reason for using staccato in Variations #5 and #6 is that they will absolutely need this stroke for Variation #7 (we can’t play spiccato at the tip, so it must be played staccato).  And, playing with a good staccato with a good sound is in some ways more difficult than spiccato, because it is played closer to the bridge, with more weight. So we need to practice the more energetic and difficult stroke first. We practice what is hard, not what is easy!

In addition, Feuillard indicates “M” (middle of the bow) in Variation #5.  For it to be played spiccato would require a very fast tempo, which is not important for a developing cellist at this point. So Variation #5 should be played with a staccato stroke, with equal attacks on the up and down bows at about 60 to the quarter note. The stroke is done in the middle of the bow with the lower arm and with the first finger “kissing” the stick onto the hairs and then releasing.

The rule that I mentioned here is “the lower the string the less bow speed is required; the higher the string the more bow speed”. That is why violinists have longer bows than bass players.

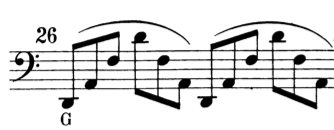
Variation #6:
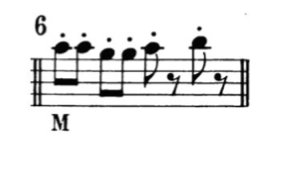
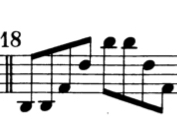
Var 6The next concept that I need to share with the student (required for both Variations #5 and #6 as well as the upcoming detaché and many other strokes) is what I call “Catch and Float”. Every individual note has a beginning (the “Catch”) and then some sort of shape from the middle to the end of the note (“the Float”). There are innumerable possibilities for each of these, and all sorts of combinations of the two together. The “Catch” can have a hard accent, or a forte/piano sound, or a sforzando, or a delicate beginning, etc. And the “Float” can be lighter or heavier or with a crescendo, etc. The more colorful and creative one can be, the more interesting the playing. But we need to have total control of the “Catch” and the “Float” for every note.

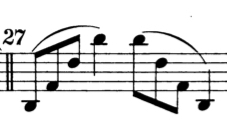
Variation #7:
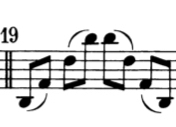
Var 7

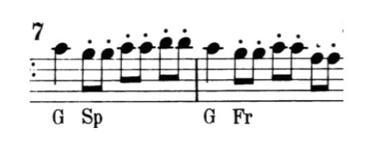
This variation deals with a combination of bow distribution and staccato (based on variations #4 and #5).  By combining these two concepts the students are working on coordination. This is a good example of how the Feuillard builds technique in a logical and sequential manner. We learn one thing, then we learn another, and then we combine them. 

For the left/right motion we need to learn a new choreography: staying on the left side when playing at the tip, and on the right side when at the frog. We will also have to change the contact point from high (for the quarter note, because of the fast bow speed) to low (for the staccato notes) for the same volume. Sometimes I need to remind the students to continue to use vibrato (that is what I was doing in this video shaking my left hand while she was playing) – this is important for the sound, but also because it involves coordinating the left/right motion with the completely different motion of the vibrato. It is like tapping our head and rubbing our stomachs!

As we work on the various bowing issues, we also always need to remind ourselves about basic fundamentals, such as our sitting position or the fact that we need to prevent ourselves from crunching down. And we need to pay attention to things like the bow angle, the Front and Back of the hand, the elbow arc, etc. In short, we need to “multi-task”. I sometimes tell the students that this is “good multi-tasking” – playing, while listening to our colleagues, while watching the conductor, etc. As opposed to “bad multi-tasking” such as driving and texting!

Next week’s blog will work with variations #8 – #13, dealing with dotted rhythms, more staccato strokes, and detaché strokes.
Blog 32: No. 36 – Variations #10 – #29

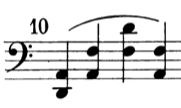
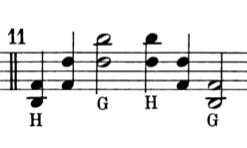
Today we will continue our journey through Feuillard with No. 36, Variations #10 – #29 on string crossings over four strings. Many of these variations are about sustaining the sound with legato or detaché strokes. As mentioned before it is very helpful to use the left/right motion in order to make it easier to get a big sound in the upper half of the bow. It is also helpful to use the “twist” motion of the upper torso in order to release tension from the arm and fingers, and to keep the vibrato going. Rather than lifting fingers, the twist in the upper body automatically helps to release the fingers.
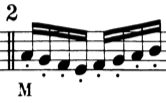
Variations #10 and #11:

Var 10Var 11

Variations #12, #13, and #14

The arm levels that I mentioned here were discussed in a previous blog. There are seven levels for the left upper arm – playing on each of the four strings and the three double-stops.

Var 12       Var 13      Var 14

Variations #15 – #19

Here are more variations dealing with detachè and string crossings in various combinations. George was mostly good about using the twist motion to his advantage – for relaxation and vibrato – but I did remind him about it once here.

Var 15 Var 16 Var 17  Var 18  Var 19

Variations #20 – #29:

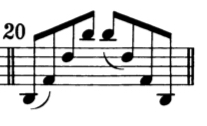
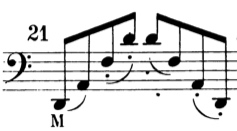
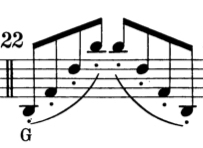
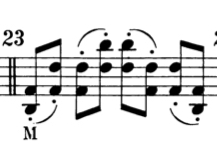
Var 20Var 21  Var 22  Var 23Var 24   Var 25VAr 26Var 27  Var 28  Var 29

These variations all continue with the same technical issues, so I just faded most of these videos halfway through. I needed to remind George occasionally about having his left arm high enough for the lower strings, but mostly he has absorbed the information about contact point, bow distribution, catch and float, the twist motion, arm levels, etc. and nailed each of these variations in the first iteration during the lessons.

Next week’s Blog will continue with Variations #30 – #38 working on double stops with string crossings, and legato strokes involving the upper arm versus wrist/fingers.

Blog 12: Feuillard No. 33 – Theme and Variations #1-3

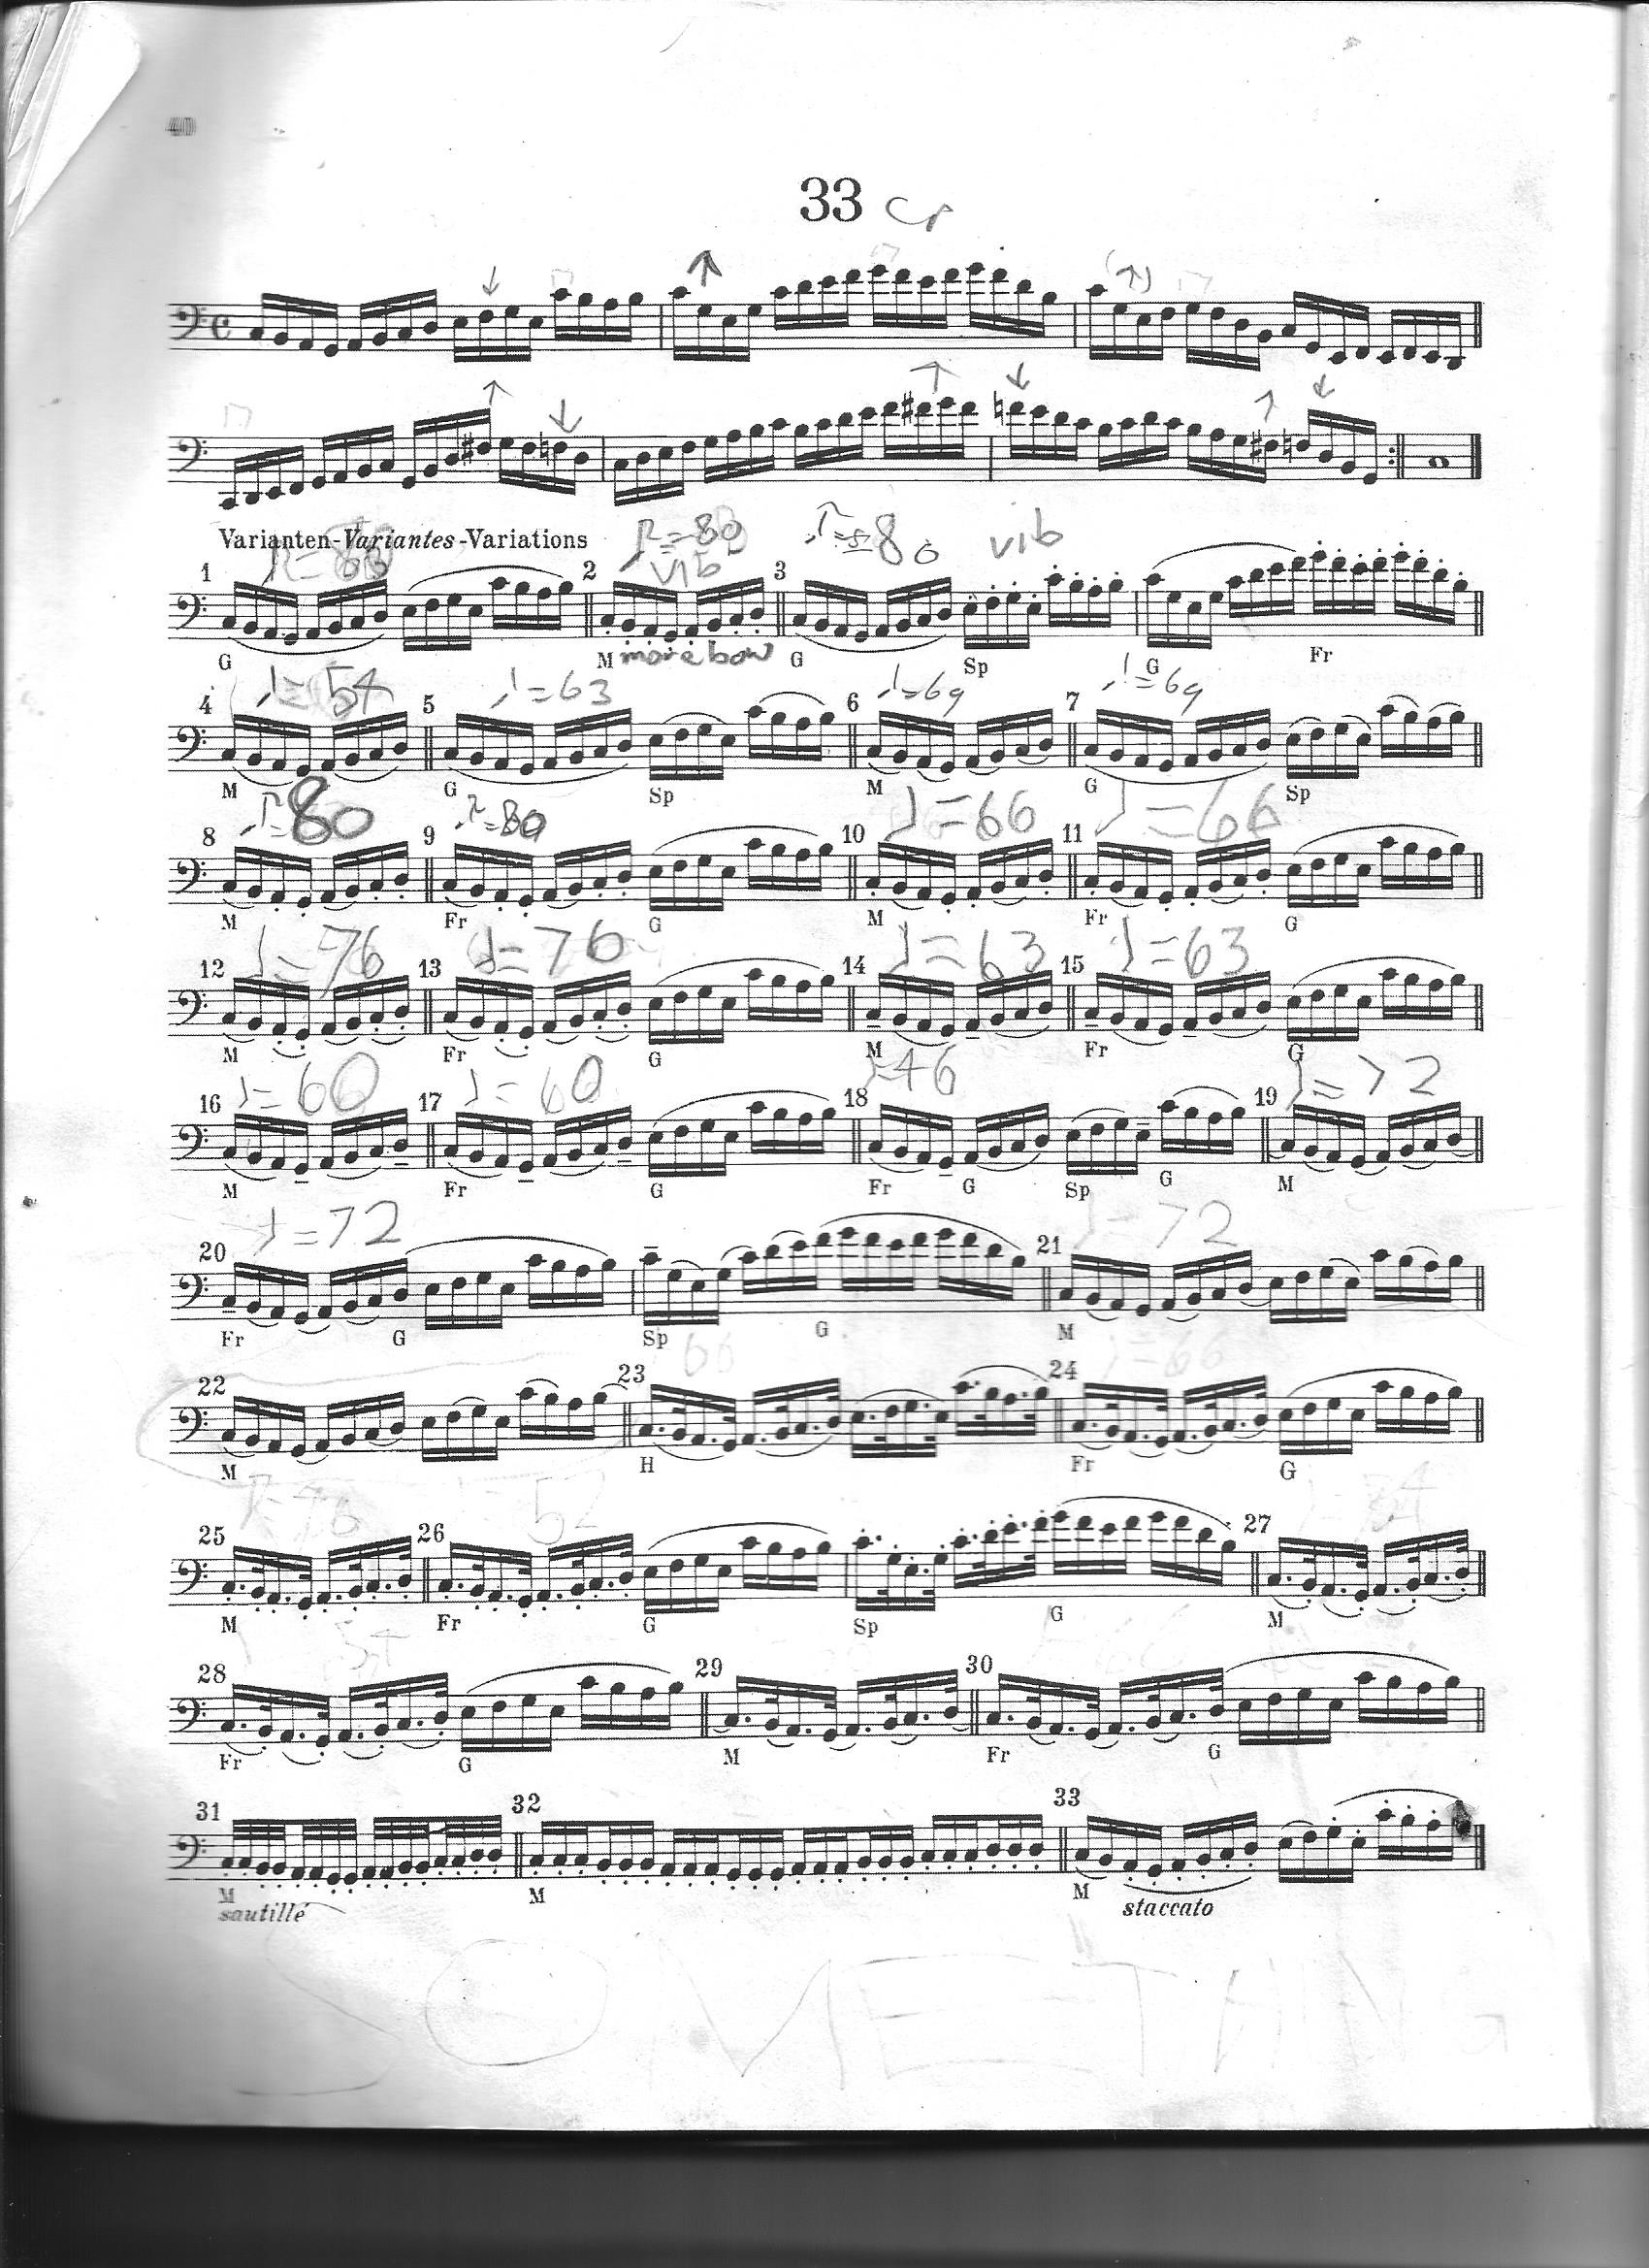
The theme of Feuillard No. 32 was all in first position. With this week’s blog we will start looking at the next page, Feuillard No. 33, which has a scalar theme that goes up to fourth position. As a result of the shorter string length in the higher positions, there are some new playing issues that involve the contact point. The rule that was mentioned in an earlier blog is: “the shorter the string length, the lower the contact point”. And since the contact point is lower (closer to the bridge), we must also adjust the weight accordingly (“the closer to the bridge, the more weight”).

This page is a good example of how Feuillard presents the bowing material in a logically organized sequence, while adding some new variables to the mix. The variations on this page deal with some of the same bowing issues as No. 32, including detaché strokes, staccato, and bow distribution, but the coordination issues are somewhat more complicated.

Theme of No. 33:

Theme

The videos in today’s blog, and the subsequent blogs dealing with No. 33, all feature my student Iestyn, who has studied with me for a year. He went through the variations of No. 32, and understands those basic bow concepts.

When first playing the theme I want the students to focus on their intonation before they start thinking about the various bowing variations. Notice that Iestyn knows to check first position before starting (without my telling him to do it), so that the left hand position is set. He also remembered the concept of Expressive Intonation. These are two of the basic ideas about intonation that need to be internalized by this point.

An additional problem involving intonation is what I call “bow intonation”. This occurs when the bow is in the wrong contact point (probably too close to the finger board) and when there is more weight than required. The weight of the bow actually  pushes down on the string and bends it, making the pitch go higher. When this happens people think that their left hand is in the wrong place, but it is actually the bow that is causing the string to shorten and the pitch to change.

Variation #1:

Var 1

This variation involves playing legato, with many notes in the bow – therefore it needs a low contact point. Iestyn remembered most of the concepts from No.32, including (nicely!) son filé (“spun sound”), which is the idea of playing many notes in the bow with a low contact point.

Variation #2:

Var 2

This variation should be played staccato, like some of the previous variations in No. 32. By this point the student should know all of the issues involved in playing staccato (i.e. which finger is important, what kind of contact point is needed, which part of the arm is used, etc).

Variation #3:Var 3

This variation is rather complicated, dealing with lots of issues: bow distribution, using full bow, playing staccato at the frog and tip, making the sound and articulation match at both ends of the bow, contact point problems, left/right motion, keeping a steady tempo, and coordinating vibrato. We had similar bow distribution problems in No. 32 (eg #4, #7, #13), but this is much more complicated because every note has a different set of properties, and the cellist has to be able to predict what is necessary for a good sound on every note. This is a another good example of how well Feuillard has organized all this material. The basic bow distribution concept was presented three times before this point. In between, the student would have time to absorb the concept before it is approached again in a slightly more difficult variation.

We are also at the point in the student’s development that we need to “turn the screws” a little bit, and raise the expectations. This variation is a good one with which to do that. You will notice that I spent a good bit of time trying to help Iestyn listen better to what he was doing, and helping him recognize what he needs to do to play even better. You will also notice his frustrations in doing so. The feeling of frustration is something that teachers need to address occasionally. We all feel frustrated at times – but we need to figure out how to deal with the frustration by talking about it and recognizing that we are not alone in this. We also have to be sensitive to know when a student is beginning to feel frustrated.

At the same time is up to the teacher to set high standards for our students. They will come up to those standards if we set them clearly, and if they are within reach for the student. It is our responsibility to set those standards and expectations in a healthy way – and to explain to the student why this is necessary.

Since he didn’t quite get all the technical issues, here, I asked Iestyn to repeat the variation in the next lesson – which you will see at the end of the video, after he practiced this variation for another week.

Recently I came across a video that I had made in 1990 with my then-student Adrienne Woods. Adrienne studied with me through high school and then through college at USC. She has since gone on to have a fantastic career in Hollywood and L.A. doing studio work, television shows, and touring with artists such as John Legend, Ariana Grande, and Adele. Here she is in a lesson going through Feuillard No. 33 when she was 12 years old:

As teachers we plant seeds. We water them, and tend to them, but we don’t know how the plants will grow. We work with our students providing knowledge, helping them fight frustration, giving them the tools they need, showing them how to practice, setting standards, sometimes mentoring them and sometimes comforting them –  and then we release them to the world. One of the joys of teaching is watching where the students’ journeys will take them.

Disney Hall

You can see Adrienne’s website at https://www.adriennewoods.com .

Next Monday’s blog will continue variations that deal with legato playing and bow distribution.

Blog 18: Feuillard No. 34 – Variations #1-5

In the last lesson I gave Tristan lot of information about the parts of the arm that do the vertical and horizontal motions, and I showed him the four basic bowing figures.  In the next lesson I usually ask the students to give me the “lecture” back. In this video, Tristan takes me through all the information from the previous week and he demonstrates all the bowing figures to make sure that he has absorbed all the information.

Notice that I am not talking with Tristan about things like bow changes at this point. I want him to focus on the main issues of the bowing figures, bow angles, left/right motion, etc. Other subtleties will come later. As teachers we always have to pick and choose what the most important issues are when a student is learning something new. Sometimes we need to delay the “secondary” issues, even though we are tempted to bring them up as well. Otherwise a student may feel overloaded with too much new information.

So these are the basic shapes that we use in string crossings. All string crossings are combinations of circles, arcs, figures eights and waves. Even complicated passages from the literature are built from these shapes. In practicing these passages it is sometimes useful to break them down into their component parts in order to make sure that the motions are smooth and connected, and that the correct part of the arm is being used. Here are a few examples from the repertoire:

Here is an example of an Arc motion from the Prokofiev sonata:

prokofiev

When the opening of the first Bach Suite is performed with slurs (stylistic questions aside!) the motion is obviously a wave. The first three notes are played with the upper arm, followed by the wrist (the upper arm remains on the A-D double stop level). For the up bow, the upper arm is again used to go back down to the G-string, followed by the wrist and fingers: bach - prelude iIn the Gigue from the Third Suite, the motion involved is a figure eight, which then reverses direction after four measures. The arm is on the G-D double stop level, and the wrist does the string crossings:bach 3 - gigue

In the following example from the Shostokovich Concerto, the circles that are produced reverse direction in every measure:

shosty example

In this example from the Brahms F-major sonata, the wave motions are produced by the wrist and fingers throughout because it is so fast. brahms f exampleThese are just a few examples from the literature. Every passage involving string crossings is different, but it is helpful to analyze the underlying bowing figures involved and to practice them slowly.

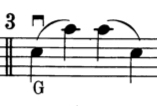
So, back to Tristan. Now we are ready to start the variations on this page.

Variations #1, #2, and #3

Var 1      Var 2     Var 3

These variations require use of the full bow, the upper arm, and left/right motion. The first variation involves the Figure Eight, the second variation is an Arc, and the third is a faster version of an Arc with the upper arm.

Variation #4:

Var 4

This variation is the reverse Arc from variation #3, but it is a bit more complicated because one has to be aware of the string crossing motion coming from the upper arm. At first students will often try to make the motion from the lower arm. This may seem to be more “efficient” but it is problematic in that the elbow joint does not move up and down, and repeated motions will ultimately cause problems such as “tennis elbow” or tendonitis. I asked Tristan to work on this again during the week, and he came back to the next lesson with it much better. However, this is still a “work in progress” and as a teacher I have to be vigilant in watching how students do this motion.

Variation #5:

Var 5

This variation is the Figure Eight, and it presents a similar problem as the Variation #4. Cellists must make sure that the string crossing is happening with the upper arm (not the lower arm!), in order to avoid tension and prevent eventual issues such as tendonitis.

Today we saw some variations with the Arc and the Figure Eight.  Next week’s Blog will continue with Waves and Circles, and other variations will add detaché to the mix.

Blog 11: Feuillard No. 32 – Variations #27-30

Today’s blog will focus on circular motions, ballistics, and strokes at the frog that combine the upper arm and wrist.

Variations #27:

Var 27

For this variation, I ask the students to use the full bow at a fairly fast tempo, rather than just playing at the frog as indicated. I am interested in seeing whether they can play with the bow remaining parallel to the bridge at a relatively fast bow speed, while using left/right motion.  This is similar to the very first variation, although it is with all down-bows and a much faster bow speed. If the bow skits up or down the string, then the bow angle is not correct.

I also use this variation to introduce the vital concept of a “ballistic motion”. According to neurologist Dr. Frank Wilson, this is “very energetic and short lasting. It launches the limb in a set direction and ceases long before the limb will have completed its course of action. Because of the similarity of this kind of move to the firing of a gun shell, it was called ‘ballistic’. ”

We have two possibilities for bringing the bow back when you reach the tip. You can either pull the hand back, which uses muscles, or you can use the “boomerang” effect to let the arm bounce back. The latter saves energy and is a more efficient use of the body.

We also use ballistics in vibrato: instead of actively moving the arm up and down in the vibrato motion, we can save energy by initiating the motion upward, and then letting the arm bounce back in the opposite direction by relaxing. We will also use ballistics in the next several variations.

Variations #28-30:

Var 28-30

These variations explore the interaction of the upper arm (active motion) and the wrist (passive motion) at the frog. Ballistics also plays a role in these strokes. One of the goals is to figure out how to release tension, so that we are not squeezing the thumb on the frog in a “death grip”. It is also important that the bow stroke always starts from the string, especially on the upbows in #29 and 30.

With today’s Blog we finish the page of Feuillard No. 32 and all the variations.  I would like to thank Caroline for having agreed to be featured in these videos. She has made remarkable progress in her basic understanding of bow usage, and she has changed her perception of sound over the last few weeks. She will be continuing her bow work with the variations in No. 33 and beyond.

With next week’s Blog we will start on Feuillard No. 33 . My student Iestyn will be working on the theme and variations on that page as we explore further concepts about bow usage including son filé , flying spiccato, coordination, bow distribution, etc.

Blog 13: Feuillard No. 33 – Variations #4-9

In today’s blog we will continue Feuillard No. 33 with the Variations #4-9, dealing with legato playing, staccato strokes, and bow distribution.

Variation #4 and #5:

Notice in the video that Iestyn knows the tempo of these variations when I asked him, because he has written in the tempos that he thinks are good as he works on them at home:

Feuillard 33

It is important for the students to be able to imagine their tempos before playing them in the lesson. Having practiced them well at home, they should be able to predict the tempos pretty closely. If they can’t then it is a sign that they are not using the metronome in their practicing. Although rhythm is one of the most basic music elements, teachers often forget to stress the importance of developing good rhythmical skills. These concepts are often ignored or forgotten while focusing on other elements of playing: intonation, tone color, technique, etc.  Developing good skills of rhythm, pulse, tempo, meter, timing, as well as related concepts such as keeping a steady tempo, ritardando, accelerando or rubato are fundamental for a good musician.

In Variation #5 Iestyn showed that he had made good progress in using the full bow, compared to the difficulty he had with that in a similar variation (#3) earlier. By terracing the various technical issues in Feuillard, students can conquer a particular problem in one variation and then move on to deal with the next issue in another variation.

Another issue that I like to address in Feuillard No.33 is the height of the left elbow. Even though we are working on right hand problems in these variations, it is also a great way to address the left hand issues (intonation, vibrato, arm height, etc) since the students are repeating the same notes so many times. In this case I worked with Iestyn on the left arm height:

Many students get in the habit of playing across the strings without using the support of the arm. That means they often create “kinks” in the wrist, which causes tension in the hand and prevents people from moving the fingers fast. I will address the “twist” motion mentioned here in much more detail when we get to Feuillard No. 35 and No. 36. But my goal here is to get Iestyn to be aware of the basic height of the arm on the different strings.

Variations #6 and #7:

Var 6

These variations continue with legato playing and bow distribution. Legato playing requires maintaining the weight on the bow, without re-articulating or pulsing, and with no portatos in the stroke. This is particularly difficult with string crossings, where we need to think like pianists. Because the piano is a percussive instrument, with a hammer striking the strings, it is impossible to truly play legato. However pianists give the illusion of legato by slightly overlapping the notes. Like a magic trick, it gives the impression of a true legato. When cellists play string crossings in legato, we need to similarly overlap the two notes to give the illusion of the legato that we can play more easily on one string.

I had to remind Iestyn about what we had worked on earlier with the left arm. Learning and absorbing new technical information takes several repetitions. As a teacher I have to be like a dog with a bone: not letting go! I have to constantly remind the students about whatever I am trying to get them to make as habits, until just a visual cue might be enough. Eventually, if I am “stubborn” enough, they will be doing what they need to do without reminders. I guess teachers have to have a bit of a “control freak” personality – otherwise the students tend not to do what we are trying to get them to do.

Variations #8 and #9:

These variations are similar to the earlier pairs (#4 & 5, and #6 & 7). But now I needed to talk with Iestyn again about his bow angle in Variation #9. Here I worked with him on the concept of “proprioperception” (awareness of where the arm is in space), which seemed to click with him this time:

As I mentioned before, in these blogs I am rarely showing the full “performance” of each variation. However, in the lessons the students do play the variations in their entirety. This is important because they are not only working on the specific details of each variation. They are also working on endurance, the ability to concentrate, and getting used to “performing” without stopping. Yes, I hear these variations all day in lessons from lots of different students. Maybe I am nuts,  but I actually enjoy hearing them, and don’t get bored. Every student has a different sound, a different personality, and different problems or issues to solve in their playing – so it is always interesting!
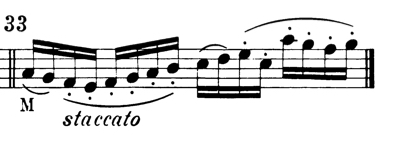
Next Monday’s blog will continue work with staccato bowings and bow distribution.

Blog 14: Feuillard No. 33 – Variations #10-20

This week we will continue with variations dealing with staccato, flying spiccato, bow distribution, and some asymmetrical bowings.

Variations #10 and #11:

Var 10     Var 11

These next two variations continue with the issues of alternating staccato and legato, plus bow distribution. In Variation #10 I reminded Iestyn about his left arm level and vibrato while he was playing. Using “sign language” can help heighten awareness while playing without stopping the “performance”. Even though these are right arm bowing exercises, it is important to also pay attention to the left arm as well. Students can get into bad habits – or they can correct bad habits – since there are so many repetitions of the variations. In this case, I was reminding him that there is a twist motion from the back when going to the lower strings. And the thumb changes position on the back of the neck. My “rule of thumbs” is: when you play on the A-string, the thumb should be under the C-string; when you play on the C-string the thumb should be under the A-string. And of course it should be round, under the 2nd finger, and not pushing up onto the fingerboard to prevent tension. Non-verbal cues can be very useful in reminding the students about their left arm while they are focusing on the right arm.

Variation #12:

Var 12

Variation #12 can be interpreted two different ways: up-bow staccato (also known as slurred-staccato or hooked-staccato) or as flying spiccato. The students will usually do the first way, since they have seen this stroke in Feuillard No. 32 already. Sometimes they will have encountered a piece that uses flying spiccato, and will have played that stroke as well. But it is important that they can differentiate between the two styles:

Up-bow Staccato: low contact point, middle of the bow (usually), first finger on the bow, heavy sound

Flying Spiccato: high contact point, lower part of the bow, fourth finger, light sound

Variation #13:

Var 13

This variation looks at first like it might be similar to the previous variation, and that one can do either up-bow staccato or flying spiccato. However…

Variations #14-#18:

Var 14  Var 15Var 16 Var 17   Var 18

These variations all continue with the previous issues, except that they add an asymmetrical bowing pattern into the mix. These are tricky to execute without distorting the rhythm or accenting the single note. The solution is to use a small amount of bow on the single note, since the more bow you use the more it sounds accented. In addition, it is important to use very little bow weight for the single note, and possibly use a higher contact point or change the amount of hair on the string by rotating the stick to have less hair on the string for the short note. It depends on the kind of sound you want, and as always depends on listening and adjusting.

In the video of Variation #18 I again motioned for Iestyn to move his elbow higher on the lower strings.

Variations #19 and #20

For #19 and #20 I ask the students to play with a “lilting” sound in order to present a different concept for playing these variations. In the Baroque period this practice of unequal lengths or varying intensity of notes is called notes inégales;  in jazz it is called “swung notes”.

Notice that Iestyn checked his first position before the final playthrough of #19 in this video: the first finger with the string above (Perfect 4th) and the fourth finger with the string below (Perfect Octave).  I ask that the students check the intonation before each playthrough in order to solidify the hand position. This way they get good intonation ingrained in their ear – otherwise it may be more random. With all the repetitions of these notes this is a good way to establish a good baseline for intonation. However for these videos I have usually cut out the checking process to save you from listening to that every time – but, be assured, the students check the intonation before every variation!

Notice also that I worked with Iestyn here on eliminating the sound of the shifts between first and fourth positions. While this is not the primary goal of these variations, it is important to call attention to the secondary issues that come up, especially when the students are successful in solving the bowing problems. However, as always teachers have to weigh what is important and what is not important at any given moment in a lesson. We usually have to let go of the less important issues in order to focus on the main topics. It is always a question of priorities.

One other thing to note: in these videos you usually don’t see how many times I ask the students to repeat a given variation in order to bring it to “conclusion”. Sometimes that is frustrating to the students. At the end of #20 I reminded Iestyn of Einstein’s quote about excellence.

Next week we will continue our exploration into those notorious dotted-rhythms!

Blog 15: Feuillard No. 33, Variations #21-26

Happy Holidays! This week we will be working on two of the most difficult variations in No. 33, and then continue with more variations involving those “notorious” dotted rhythms.

Variations #21 and #22:

These two variations are perhaps the trickiest on this page of Feuillard No. 33. As I explained to Iestyn in the video, the problem is that the pattern here is in groups of three notes superimposed over a theme which is organized in groups of four notes. As a result, the interplay between these rhythmical units can trick the brain. There are several ways to work this out. Some students actually end up writing the bowings on the music – but it is much better to feel the groupings of the notes. A good technique for feeling the groupings is to focus on just the single note, which is a down-bow in #21 or an up-bow in #22.

I also like for the students to recognize that when they are practicing these bowings they are practicing for passages in real literature that they will be playing in the future. In this case, I pointed out the last part of the Paganini Moses Variations.  There is also a passage in the beginning of the first movement of the Dvorak concerto which has a similar bowing pattern and often sounds like triplets, though it is written as sixteenth notes.

Variations #23 and #24:


We first worked on dotted-rhythms in Feuillard No. 32. Mr. Feuillard introduces dotted rhythms right in the beginning of No. 32, in Variation #8. Then he presents them again later in Variations #18-21 in order to give the students a chance to dig deeper in their understanding of these difficult rhythms. Dotted rhythms are notorious for string players, and they are often played very sloppily. Now with Feuillard No. 33 Variations #23-30 we hope to refine our ability to play these rhythms even more. I like the way that Feuillard gives some time and space between the presentations of these issues, so that students have a chance to understand and absorb the issues before refining them further.

At this point Feuillard introduces the two different kinds of dotted rhythms: “legato dotted rhythms” and “staccato dotted rhythms” (also called “dotted-dotted rhythms” because of the dot on the head of the note). Variations #23 and #24 are the legato type. Variations #25-28 are all the staccato type.

Iestyn had not formally studied the distinction between these dotted rhythms yet, but we had addressed it briefly in an early etude that we had done (Dotzauer #16). I like working on that etude with students because it deals with a big core sound (Maestoso), left-right motion, and becoming aware of details in the text – in this case the difference between the two types of dotted rhythms. I do almost all the etudes in Dotzuaer Book 1, and Iestyn has just finished that book and is starting Lee Melodic Etudes, Book 1. But he forgot that we had touched on this issue several months ago when he started studying with me.

I also spoke with Iestyn again about the height of his left elbow on the lower strings. I have talked about this a good bit in the past, but it has still not stuck with him (see Blog 13!). That happens all the time with students. I discuss some technical issue – but it doesn’t actually get solved.  I have to keep bringing it up again and again.  Finally it sinks in and becomes a habit.  Sometimes it just means describing the issue in a different way, with a different metaphor, or using a different exercise. But often it means just harping on it and not letting the students get away with less than your expectations for them. Sometimes I think that a teacher has to be a bit of a “control freak” by insisting on students making the corrections, especially when certain wrong physical motions are already ingrained. Otherwise they will not make the changes that are necessary. I hope that this time Iestyn will get the point about the arm height, but only time – and next week’s lesson will tell if he has truly absorbed the concept!

Variations #25 and #26:

Var 25

Var 26

While Variations #23 and #24 feature legato dotted rhythms, Variations #25 and #26 call for the staccato dotted rhythm. I reminded Iestyn here about the “relax” exercise that we had discussed earlier in No. 32 (see Blog #9 in this series). It is vitally important to release tension while playing, and especially necessary in dotted rhythms.  Variation #26 throws bow distribution into the mix, with the goal of producing the same sound with the same amount of bow at the frog and at the tip. For the dotted rhythm stroke at the tip we need to focus on the down-bow, which has the “energy” in the stroke and which brings us back to the tip each time.

Sometime around this point in the student’s development I like to introduce some bow coordination exercises outside of Feuillard. The following is a set of coordination exercises that work on down-bows and up-bows at the frog and tip, along with left-right motion. The goal is to get the same sound with the same amount of bow at each end of the stick, and to coordinate that with the large left-right motion body movement.

Bow Coordination Exercises

These exercises are a bit tricky at first. Finding the right choreography for the left-right motion is an important part of the coordination issues here. I showed this exercise to Iestyn and he picked it up quite quickly. I then asked him to live with it for a week and do a G-scale using these exercises in the following lesson to make sure that they were ingrained in his body and brain.

These exercises are also really good for making sure that the bow angles are correct at the frog and tip. I had to remind Iestyn to “bow out” at the tip several times. Working on getting a good bow angle (parallel to the bridge, or perpendicular to the strings) is a constant process. It was one of the first things I addressed with Iestyn when he started working with me, as with all students. But it is something that needs periodic reminders – otherwise we get sloppy and the bow angle becomes incorrect. Even very advanced players need reminders – and I am constantly checking my own bow angle, using a mirror or in videos. The reason that this is such a problem is that our arms swing naturally from the shoulder joint in a circular direction around our bodies. But in order to have a “straight” bow we need to bow away from our bodies.

In next week’s blog we will continue our work on dotted rhythms, and finish up Feuillard No. 33 with more sautillé and up-bow staccato exercises.

Blog 16: Feuillard No. 33, Variations #27-33

Happy New Year! I wish you all a happy and healthy 2019 – with great intonation and beautiful sounds on the cello!

Today’s adventure in Feuillard-land will continue with some more dotted rhythms, and then return to the sautillé and up-bow staccato strokes that were first addressed in No. 32.

Variations #27 and #28:

Var 27

Var 28

These two variations continue with the staccato dotted rhythms from last week, but this time with hooked bowings. As I mentioned in the past, I ask the students to play each  variation completely in the lesson. In part this is for developing skills of concentration and relaxation. But also because every note on the cello has different properties and we are trying to make them all sound the same. There are no short-cuts in learning these principles, and our job as teachers is to be patient and provide a nurturing, supportive environment in which the students can develop their skills.

Variations #29 and #30:

Var 29

Var 30

For these variations I like to ask the students to play again with a “lilting” sound (like we did in Variations #19 and #20). That means releasing more and floating on the longer notes, and using a more gentle articulation. Iestyn had already used this stroke in the first movement of the Goltermann Concerto #4, and in the Dvorak Humoresque.

Variations #31 and #32:

Var 31       Var 32

These two variations work again on the sautillé stroke that was first encountered at the end of No. 32 (Variations #25 and #26). It has been several months since Iestyn worked on those variations, and he has clearly absorbed the main technical issues involved:

  • using an active upper arm and a passive wrist
  • finding the right part of the bow for the bounce at any given tempo
  • getting the right contact point for a good sound
  • letting the bow bounce by itself, and staying out of the way
  • finding the right height of the bounce for evenness
  • staying relaxed
  • being able to coordinate vibrato with the stroke for a better sound
  • getting the tempo to be faster

In this performance in the lesson Iestyn was able to get the tempo up to 75=quarter note, which is much faster than he had been able to play the sautillé variations in No. 32. As I mentioned to him when we worked on those earlier variations, our goal is to get to 80 in order to be able to play the Elgar Second Movement at the tempo indicated by the composer. With a little more time Iestyn will undoubtedly reach that tempo – and I look forward to hearing him play the Elgar in a few years!

Variation #32 is a bit more complicated for coordinating the left and right hands, and it is still a “work in progress” for Iestyn.  Although the main beats are all down bows,  the bowing direction reverses on the subdivided part of the beat because of the triplets. One has to be careful that the left hand is together with the right hand, and recognize that the subdivided part of the beat is on an upbow. It is good to slow it down and stop on those upbows until they are ingrained in the body. It is also sometimes helpful to feel the upper arm moving “in” and “out” for those subdivisions. I recommend practicing this with the left hand leading; and then with the right hand leading. It feels different to us when one hand or the other is “leading” – and we have to figure out which one results in a better performance. This Variation was still a “work-in-progress” for Iestyn.

Variation #33:

Var 33

This is the final variation in No. 33, and it works again on the issues first seen in No. 32 (Variations #22-24): the up-bow or down-bow staccato (or “hooked staccato” or “slurred staccato”) However instead of repeating the same notes with the staccato stroke, this time the variation requires more coordination between the left and right hands. Once again Feuillard first presents a concept in a “simple” version, and then adds complexity later.  Iestyn has absorbed the basic technical issues from his experience with the earlier variations, and he played it well in his first attempt.

I reminded Iestyn about the Heifetz “Hora Staccato”, and suggested that he listens again to the Locatelli sonata for “inspiration” about this stroke. I also suggested that he should continue to work on both the sautillé and staccato strokes so that when he approaches pieces such as the Tchaikovsky Rococo Variations he will have the tools needed to be able to play them.

I would like to thank Iestyn for being the “guinea pig” in all the videos of Feuillard No. 33. He has made great progress in his bow technique.

With the New Year, next week’s blog will begin the critically important work on string crossings, with the Feuillard No. 34. We will examine the different parts of the arm that can do these vertical motions, and analyze the four bowing figures that are the basis for all string crossings. My pre-college student Tristan will be featured in the videos as he begins his work on these variations.

Blog 17: Feuillard No. 34 – Basic String Crossing Information

With this blog we will start working on Feuillard No.34, which focuses on the important topic of string crossings. No. 34 deals with string crossings across two strings; No. 35 is about string crossings across three strings; and No. 36 works on string crossings across four strings.  This topic is critical for string players – we work our entire life trying to make string crossings smooth, connected, and ergonomically correct. We try to use the correct parts of the arm, keeping the joints well-oiled and flexible. We try to make the hard bones of our arms look like they are soft and pliable like the “break-dancers” of the 60’s and 70’s. Fluent bow arms are not only beautifully functional, but they are aesthetically pleasing. Think of French cellists such as Navarra, Fournier, or Gendron.

Today’s blog will be rather long because there is a lot of basic information about string crossings that I need to present. This includes some knowledge of the parts of the arm and how they move, as well as an understanding of the four basic bowing figures that we use for all string crossings.

I usually begin working with students on this topic by asking them to play the theme of No. 34 as double stops, making sure that they can identify the intervals. In these videos I will be working with Tristan, who has studied with me for a year and has gone through the earlier pages of the Feuillard (Nos. 32 and 33).

Theme of No. 34:

Theme

Next I discuss the four parts of the arm, the joints that connect them, and how the various parts move. I write this information in the student’s notebook to make sure that they can review everything and explain it back to me in the lesson the following week.

So there are four parts of the arm, and those parts are connected with different kinds of joints:

  • Upper Arm – connected to the shoulder with a Ball and Socket Joint
  • Lower Arm – connected to the upper arm with a Hinge Joint
  • Wrist – connected to the lower arm with an Articulated Joint
  • Fingers – connected to the wrist

Because of these different joints, the four parts of the arm move in different directions:

  • Upper Arm – all directions
  • Lower Arm – horizontal motions
  • Wrist –   all directions
  • Fingers – vertical motions

The horizontal motions on the cello create all our different strokes: detaché, legato, martelé, staccato, etc. Even in such strokes as spiccato or sautillé, the basic motion is horizontal;  the bow bounces off the string because of the flexibility of the bow and the use of the little finger or the wrist.

So, based on the information above, three different parts of the arm can produce these horizontal strokes:

  1. Upper Arm
  2. Lower Arm
  3. Wrist

The vertical motions involved in playing the cello produce the string crossings.

Based on the information above, three different parts of the arm can produce these vertical motions:

  1. Upper Arm
  2. Wrist
  3. Fingers

I am always in awe of the “design” of our arms. The alternating “ball and socket” and “hinge” type joints enable us to be able to move in all directions and reach out in space as far as the arm length allows us. At the same time, the design is such that we can use the arm for strength and/or for finely detailed dexterous movements. If we had a “ball and socket” joint at the elbow we would not be able to use our strength to handle heavy tools or press when needed. And our arms are so different from four-legged animals like horses (which don’t have arm-like appendages or ball-and-socket joints) or even other ape-like animals (which don’t have prehensile thumbs).  Ah, evolution!

Next we will work on what I call Bowing Figures – these are the four basic shapes that are produced when we do string crossings. All the complicated string crossings that are possible on the cello boil down to four basic Bowing Figures. This is the first one:

Arc

So the examples above are all various Arcs.  If you reverse bowing direction it creates another arc in a different direction.  Some people can imagine these geometric shapes easily, but for some I need to have them actually draw the shapes on a piece of paper while they are playing.

Here is the next Bowing Figure:

circle

So, that was a circular motion. Whether an ellipse or a circle comes out depends on which strings one plays. If you play the G and D strings it produces more of an ellipse. Playing between the A and C strings produces more of a real circle.

Sorry that I was blocking the camera in the last video, but what I did was to put a pencil in Tristan’s hand between his second and third fingers, and then held the pad so that when he played the motion he could see the circle on the paper.

The next figure is:

Figure 8

That was a Figure Eight, or infinity sign. That is often the most difficult one to see at first.

The next is usually the easiest one to visualize:

wave

Next I ask the students to summarize these motions and see what they have in common. When they were first playing these Bowing Figures, some students think that they were seeing straight lines in shapes such as rectangles or squares instead of the curved lines in circles, arcs, figure eights and waves. It is important for them to realize that all of these string crossings are rounded figures.

So, in summary – there are four basic Bowing Figures which are produced in all string crossings in various combinations.  They are the Arc, Circle, Figure 8 and Wave.

I made the following pictures with a laser light, demonstrating the four basic Bowing Figures for an article on string crossings in the Strad magazine from September, 2016.

Arc:

In next week’s blog Tristan will take me through all the information from this lesson, giving me the “lecture” about the parts of the arm and all the bowing figures to make sure that he has understood and absorbed all the critical material. Then we will begin to go through the Feuillard variations for No. 34.

css.php